- Updated: November 8, 2022
Follow-Up Paths
Follow-Up Paths are automated follow-up workflows that are triggered by an event that you specify such as a visitor filling out a visitor registration form and other events that you will require a follow-up sequence. These events will trigger and start an automated workflow of various options such as email and/or SMS messages and other ways use for follow up. On this page it will explain how to create the steps for creating your Follow-Up Path.
How to navigate to Follow-Up Paths
Step 1 - Selecting a Trigger
Trigger Definition
When creating automated workflows, you can define the criteria that will trigger your follow-up path. Follow-up path triggers are events that cause an automated workflow to run.
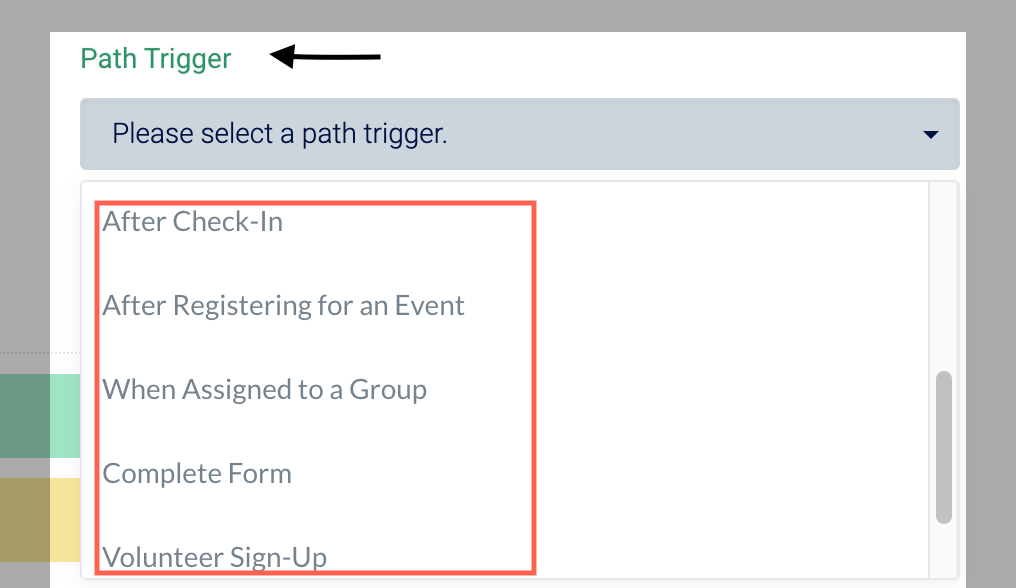
Trigger Criteria Options
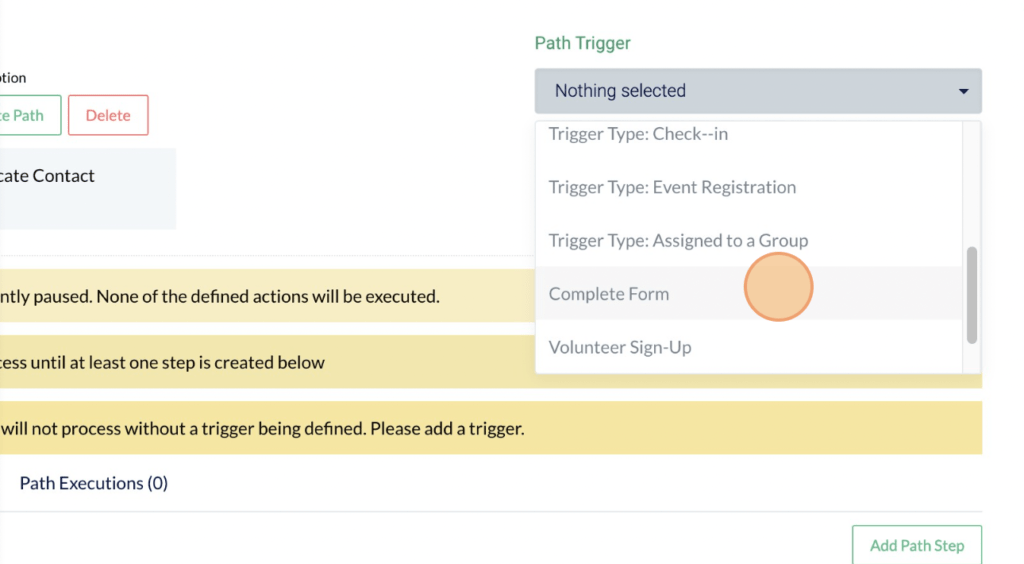
- Complete Form - once a person completed a form (you have to select which form from your created forms) the created follow-up path will trigger once form was submitted.
- Achieve a Life Event - once a person's Life Event was achieved (you need to set a Life Event to a specific person) the created follow-up path will trigger once this life event was reached.
- Apply a Custom Attribute - once a custom attribute was created or added to a person, the follow-up path will be triggered.
- After Check-In - once a person was checked in to a location or event, the follow-up path will be triggered.
- After Registering for an Event - once a person registered to an event, the follow-up path will be triggered.
- On a Birthday - once the system detected a person's birthdate (person's birthday should be recorded), the follow- up path will be triggered.
- When Assigned to a Group - once a person was assigned to a Group (you will need to select which Group), the follow- up path will be triggered.
- Volunteer Sign- Up - once a person completed a Volunteer Form (you need to select which Volunteer Form), the follow- up path will be triggered.
- URL (Webhook) - send data from another platform, system or website to trigger a Follow-Up Path configured in your Grplife account.
Execution Delay
Execution Delay tab allows you to schedule the time and day on when the created path steps will be triggered. E.g Send an email on Saturday at 10am. Though this is optional, skipping this step and tab will put all your path steps automatically to “immediate” execution. E.g Send an email. Once path has been activated and the path was triggered it will immediately send the email.

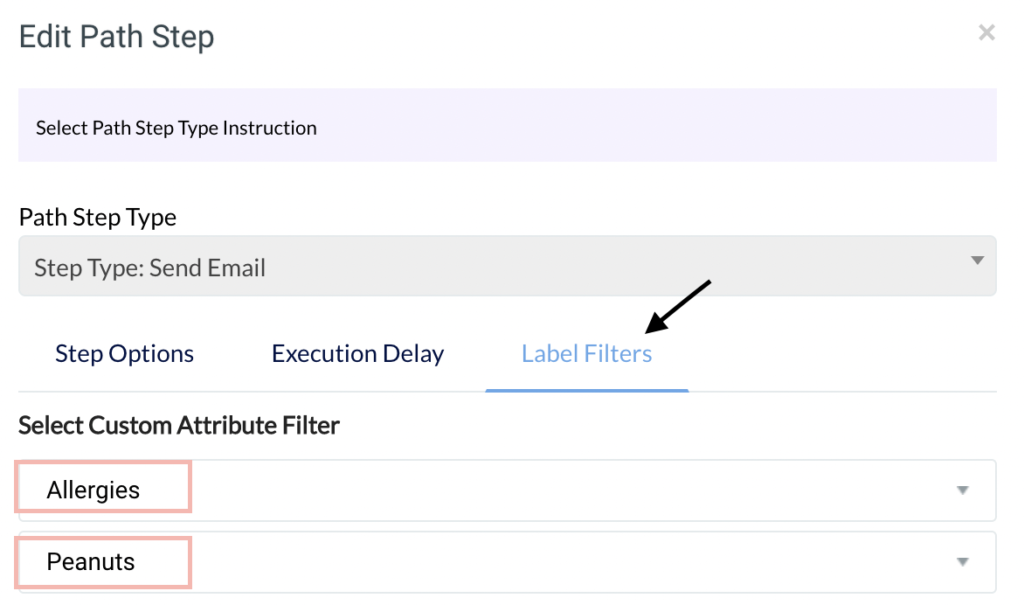
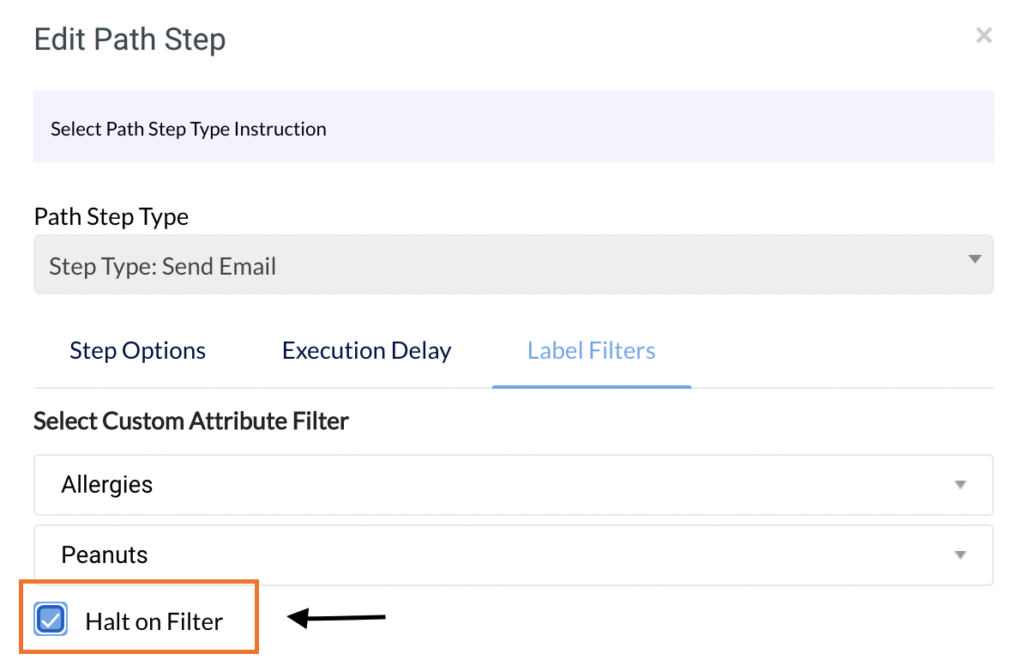
Label Filters
Label Filters allows you to filter answers from filled up forms, custom attributes and life events. Assigning a filter will determine if the path steps should be executed or not. When a custom attribute filter is added it should cause those with the specified attribute and attribute value present to make it through. However, if you select the checkbox to “Halt on Filter” this will have the reverse effect. When checked, instead of allowing the flow to continue of the custom attribute exists, the halt will prevent it from proceeding.
See sample below
Follow-Up Path Trigger is When Assigned to a Group (Sample Group: Sunday Bake Day)
*1st Path Step is to Send an Email
Execution Delay- Immediate
Label Filters/ Custom Attribute -Allergies/Peanuts
Halt on Filter – Checked
*2nd Path Step is to Request a Form Completion
Execution Delay- Immediate
Label Filters- None
Halt on Filter- Unchecked (automatically since no label filter was selected)
- John Smith was added to the Sunday Bake Day Group
- The follow-up path was triggered
- John Smith has a custom attribute saved on record as Allergies to Peanuts
- 1st Path Step which is sending an email will be cancelled (this path step will not push through) as halt on filter (allergies to peanuts) was assigned. System detected that John Smith has a custom attribute saved on record as (Allergies to Peanuts)
- 2nd Path Step which is a request to a form completion will proceed as there is no label filter set on the step.
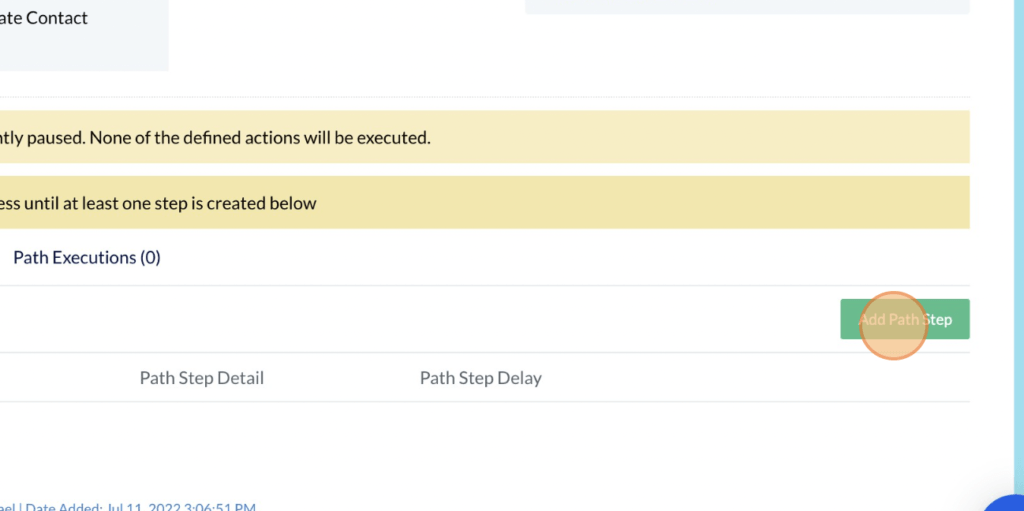
Step 2 - Creating your Follow-Up Path
-
1Click on the “Calendar” icon on the left side of the navigation bar and choose “People Planning”.
-
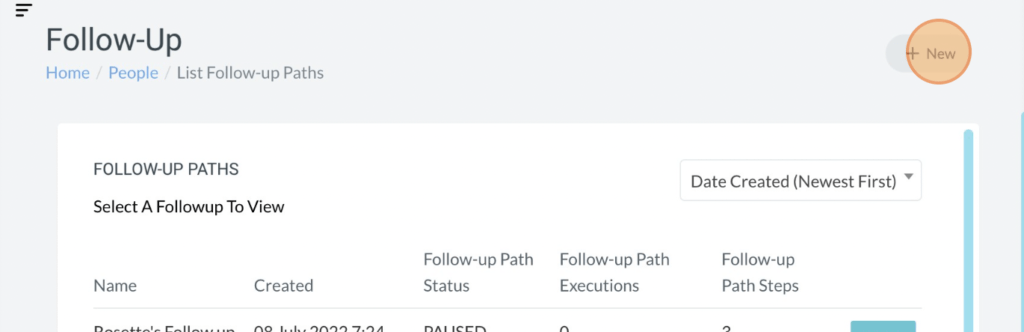
2Click People Planning then click “Follow-Up Paths”.
-
3Click “+New” on the upper right side of the page.
-
4Click “Path Name” to rename.
-
5Tick “Allow Duplicate Execution” if it will allow duplicate contact/ person to be included on the path even if it was registered before and the same follow up path will be applied.
-
6On the upper right side of the page select the “Path Trigger” ex. ( Life Event, Custom Attribute, Complete Form, Check-In, Event registration etc.
- (Note: Each chosen Path Trigger will automatically give you a drop down to select the needed information for triggering the path)
-
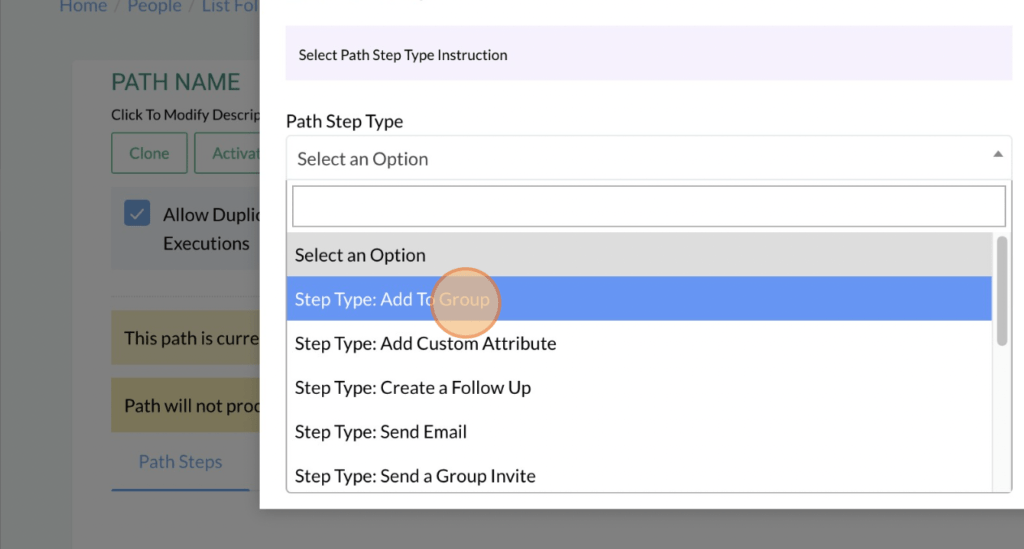
7Once selected, click “Add Path Step”. Select the type of follow up path from the drop-down menu. Ex. (Send an Email, send a SMS, Invite to Event etc.
-
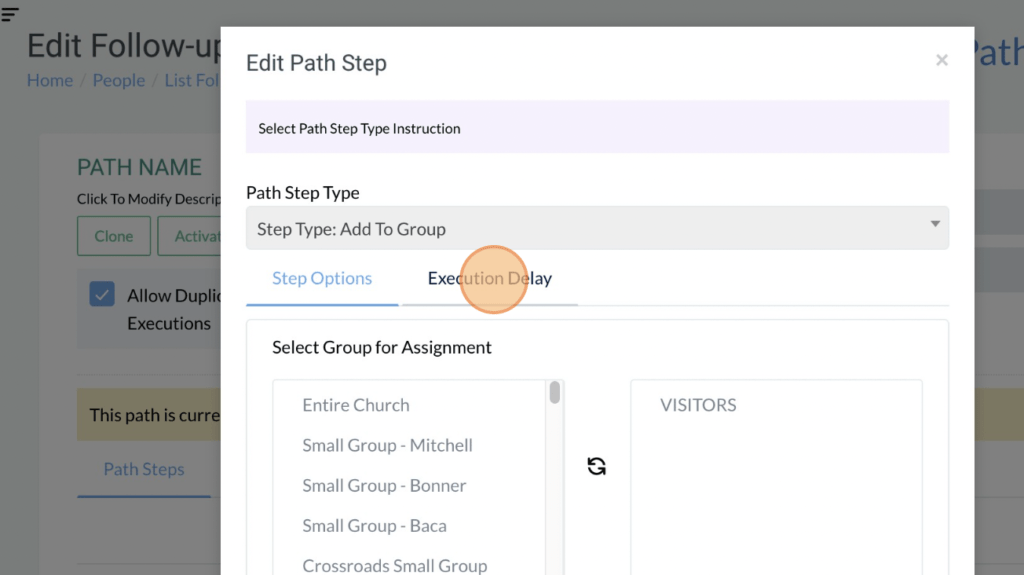
8Once selected, under “Step Options” fill in the appropriate details of the path, each path type will automatically display the needed information.
- You will have the option to either Include in Duplicate Executions for Contact or Exclude for Existing Executions. Just tick the box.
-
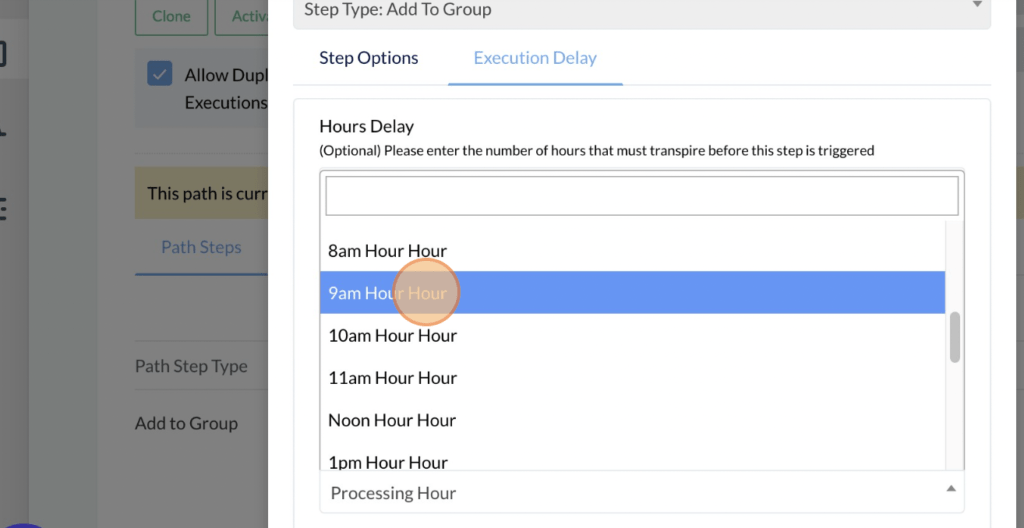
9Once done with the Step Options, click “Execution Delay” carefully fill in the desired time, (in hours or minutes) for the created path to be triggered. Optionally, you can select the Processing Day and Processing Hour for the created path to be triggered.
- (Note, Processing Day and Processing Hour cannot set an exact time like 7:15, 8:30, this option works as time per hour).
-
10Once done, click “Save”.
- You can click the " Label Filters" tab when you need to filter specific answers/responses that corresponds to your follow-up path.
-
11Once done with the "Execution Delay". Click Label Filters tab. Fill in the appropriate details of the label filters, such as Select Question (applicable if the trigger is completing a form), Select Custom Attribute Filter and Select Life Event Filter.
- Once done with the "Execution Delay". Click Label Filters tab. Fill in the appropriate details of the label filters, such as Select Question (applicable if the trigger is completing a form), Select Custom Attribute Filter and Select Life Event Filter.
-
12Once done, click "Save".
-
11Continue adding your follow-up path steps with the same instructions.
-
12Once done with the steps, click the arrow up or arrow down button to have the created path steps in order. (Which step should go first, second, third...)
-
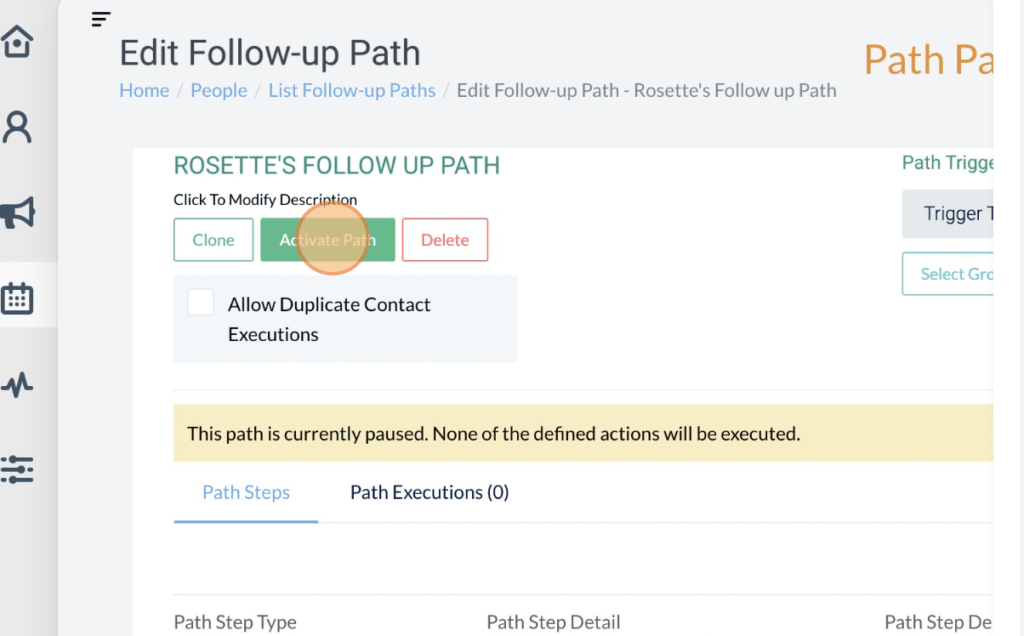
13Review each path step and its order, once done click “Activate Path” on the upper left side of the page.
- Remember to click "Activate Path" failure to activate the path won't trigger the follow-up path created
Sample of a simple follow-up path flow created for a First Time Visitor