- Updated: January 5, 2023
Forms
This page covers how you can create forms and facility forms. Our forms also allow you to do data mapping by the response and create a workflow once the form is submitted, such as Sending an email, or SMS, inviting to a group, adding a custom attribute, adding to a group, and creating a follow-up.
On This Page
-
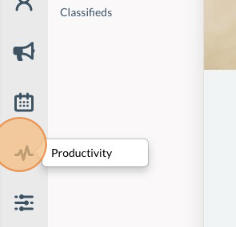
1Click on “Pulse” icon (Productivity) on the left side of the navigation bar and choose Forms.
-
2Click “ +New” on the upper right side.
-
3Rename the Form (optional)
-
4Click “Other Settings” on the upper right-side of the page. Add a form description if needed (optional) you can also set a due date for the form (optional).
- You can also customize the "Thank You" message type in the message box. Optionally, tick the "Allow Anonymous Completion" box on the lower side panel.
-
5Click “Add Question” on the left-hand-side, and fill in the box for the question.
-
6Click “Save” or “Save and add another” to continuously add questions.
-
7Put the order of the question (optional), select the question type on the drop-down, and tick the required box if the question is mandatory for the form.
-
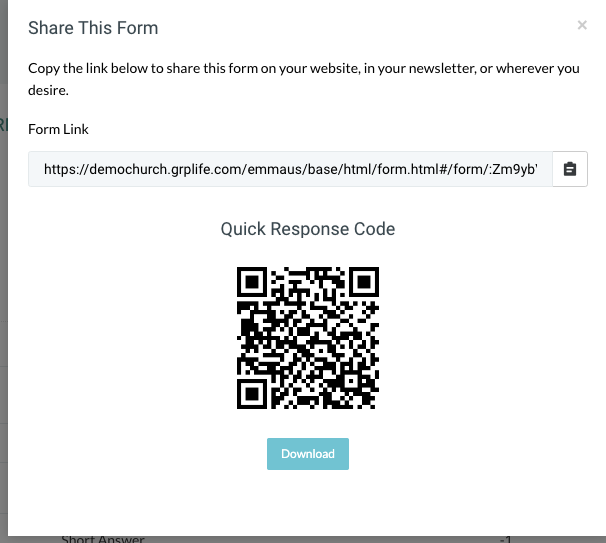
8Click “Share” to get the link of the form created. Optionally, download the scan code for sharing.
Facility Form
You can turn the form into a facility request form. This automatically pre-sets the question for the time and date of the facility reservation. You just need to add the options of the facilities to be reserved.

-
1Click on “Pulse” icon (Productivity) on the left side of the navigation bar and choose Forms.
-
2Click “ +New” on the upper right side.
-
3Rename the Form (optional)
-
4Click “Other Settings” on the upper right-side of the page. Add a form description if needed (optional) you can also set a due date for the form (optional).
- You can also customize the "Thank You" message type in the message box. Optionally, tick the "Allow Anonymous Completion" box on the lower side panel.
-
5Tick the Facility Form box.
-
6Select which resources or facilities will be included in the form options.(Clicking into each resource or facility automatically adds it as a resource/ facility option)
- By choosing the form to be a Facility Form, you do not need to add a question asking for the date and time of the facility/resource. As it automatically provides a question for the date and time of the reservation.
- If you need to add additional questions, (besides the date and time). Proceed to add questions (optional).
-
7Click “Add Question” on the left-hand-side, and fill in the box for the question.
-
8Click “Save” or “Save and add another” to continuously add questions.
-
9Put the order of the question (optional), select the question type on the drop-down, and tick the required box if the question is mandatory for the form.
-
10Click “Share” to get the link of the form created. Optionally, download the scan code for sharing.
Data Mapping on Forms
These settings are used to define how the responses provided by those completing forms will be applied to their contact profile. E.g.
Form Question- What is your email address?
Response: sample@yahoo.com
The answer to the form can now be applied to the contact’s profile when you choose to apply the data mapping to the contact.


-
1Click on “Pulse” icon (Productivity) on the left side of the navigation bar and choose Forms.
-
2Click “ +New” on the upper right side.
-
3Rename the Form (optional)
-
4Click “Other Settings” on the upper right-side of the page. Add a form description if needed (optional) you can also set a due date for the form (optional).
- You can also customize the "Thank You" message type in the message box. Optionally, tick the "Allow Anonymous Completion" box on the lower side panel.
-
5Click “Add Question” on the left-hand-side, and fill in the box for the question.
-
6Click “Save” or “Save and add another” to continuously add questions.
-
7Put the order of the question (optional), select the question type on the drop-down, and tick the required box if the question is mandatory for the form.
-
8Once all questions are set, click "Other Settings". Click "Data Mappings".
-
9All set questions will be listed and you will need to select where the response/data will be filled into.
-
10Once done, click "Save".
-
11Click “Share” to get the link of the form created. Optionally, download the scan code for sharing.
- To apply the data mapping, click the "Response" tab and click "Apply Data Mapping to Contacts."

Workflow on Forms
Workflows on forms allow you to send an email, invite a group, add a custom attribute, add to a group, and create a follow-up once the form is submitted.

-
1Click on “Pulse” icon (Productivity) on the left side of the navigation bar and choose Forms.
-
2Click “ +New” on the upper right side.
-
3Rename the Form (optional)
-
4Click “Other Settings” on the upper right-side of the page. Add a form description if needed (optional) you can also set a due date for the form (optional).
- You can also customize the "Thank You" message type in the message box. Optionally, tick the "Allow Anonymous Completion" box on the lower side panel.
-
5Click “Add Question” on the left-hand-side, and fill in the box for the question.
-
6Click “Save” or “Save and add another” to continuously add questions.
-
7Put the order of the question (optional), select the question type on the drop-down, and tick the required box if the question is mandatory for the form.
-
8Once all questions are set, click "Other Settings". Click "Data Mappings", if applicable. if not proceed to click "Edit Workflow".
-
9Tick the box on which action you would like to trigger upon submission of the form.
-
10Once done, click "Save".
-
11Click “Share” to get the link of the form created. Optionally, download the scan code for sharing.
Viewing Form Responses
-
1Click on “Pulse” icon (Productivity) on the left side of the navigation bar and choose Forms.
-
2Click “Edit” on the form you would like to see the responses for.
-
3Click the "Responses" tab.
-
4Click " View" on the left side of the page.
-
5You will see the question on the form, the response, and the time and date when the form was submitted.
- You can generate a response report by clicking the "Generate Response Report" this allows you to save and print the responses.