Click on the “Calendar Icon” on the left side of the navigation bar and select “ Service Planning”.
2
Choose Navigator, click “+New” on the upper right side of the page, and name the Navigator you want to create.
3
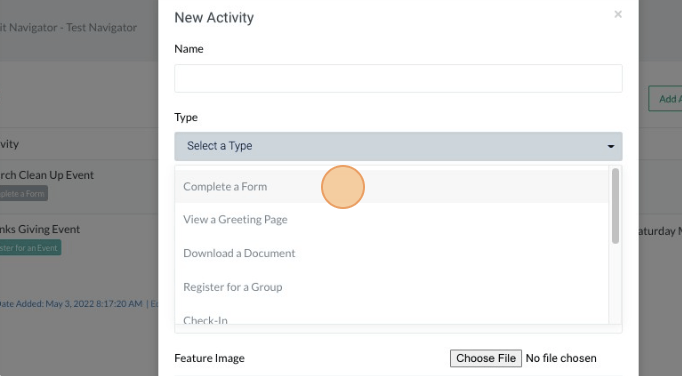
Click “ Add Activity” and choose the type of activity. (If it requires completing a form, checking in for an event, registering for a group, etc.)
4
Fill in the activity description and add a featured image (optional)
5
Click “ Save” and “Save and Add another” for multiple activities or events.
6
Once done, click the “Share button” on the upper right side to get the link of the navigator created. Click the document icon to copy the link; a QR code is also available for download to share the navigator by scanning the QR.
You can reorder the activities by clicking "Order Activities" and put in numerical order.
You can check the "Login required" box if you require the recipient to log in before signing up for forms or the other activities you created.
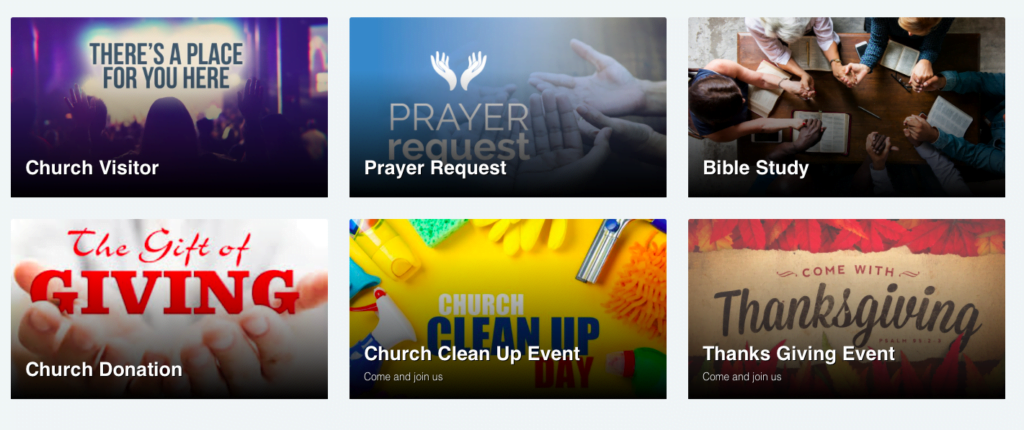
Our Sample Navigator
With the shareable link, the page will look like this (if pictures are attached). Clicking each tab will redirect you to a new page with your chosen type of event created.