- Updated: November 3, 2022
Check In
This page covers how to manage and configure check-ins. You can also watch this Youtube video tutorial to know more. You can also watch this Youtube video tutorial to learn more.
On This Page
Check-In Overview
The check-in system is made up of these three primary components:
-
1A set of web-based tools for administration and notification/alerting.
-
2An app-based and web-based kiosk system for processing check-ins.
-
3An optional print utility which can be used with the web-based or app-based kiosk
This section reviews each component and outlines how they work together to provide a reliable and cohesive experience when performing check-in-related tasks.
Getting Started
- First, create one or more locations associated with a check-in session. These locations can be added using the Locations editor in the “Configure Check-In” area of the website.
- Click on the “Calendar” icon from the left navigation menu.
- Select “Check In” and click “Configure Check-in”.
- Click “Create Location” on the upper right side of the page.
- Fill in the details such as Location Name, Location Code and Groups.
- Once done, click “Save”.
Tick the box if a Guardian is required for check in.


-
2Once locations are added, it is also recommended that custom attributes be configured in the People Manager. Open any person record, click the “Custom Attributes” tab, and create it modify attributes, indicating that they should appear when adding new records in the check-in kiosk, and are available for printing on labels in the label editor.
- For more detailed steps about Custom Attributes, check the "Creating Custom Attributes" guide.
With locations added and custom attributes configured for check-in, next, modify labels so that they contain the required information.
-
3Ensure that the appropriate groups are created, which will be used (if configured) to assign new check-in registrants. With these settings in place, you can begin configuring a kiosk session.

What to do if the page doesnt seem to process the file?

- Click on the “Calendar” icon from the left navigation menu.
- Select “Check In” and click “Configure Check-in”.
- Click “Kiosk” or “Kiosk New Window” and it will launch the configuration screen.
- In the configuration page, select the types of check-ins which will be allowed in the session. (Look Up by Name, Look Up by Id, Scan Code), once done click “Next”.
- Choose the location or event for which check-in is occurring, once done click “Next”.
- Select how many labels for printing (optional) then click “Next”.
- Select registration form (optional) then click “Next”.
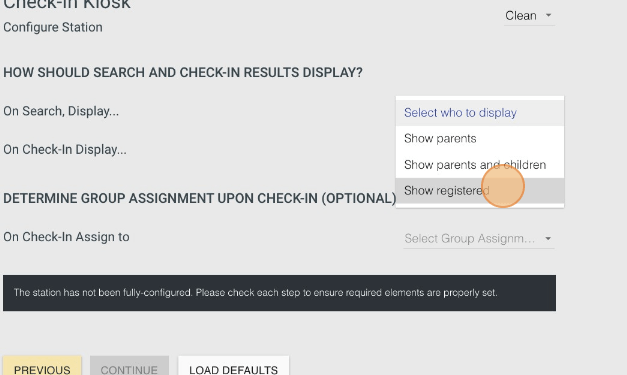
- Select how names/results should be displayed when searching by name. Then select how names/results of the family should appear when the family is selected. In other words, when entering a family name to search, should children in the family appear as well? When selecting a family to display the list of members for check-in, should that list include parents and guardians or only display the children in the family, then click “Next”.
- Indicate the group assignment for new registrants. This is to say, for every new person registering to check-in to a particular location, which group should they be assigned to for attendance and general check-in, then click “Continue”.
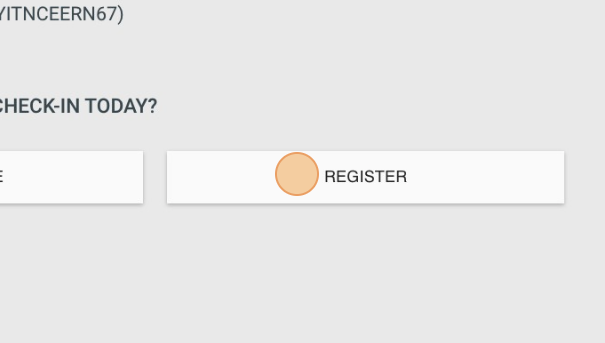
- Click ” Register”.
- Fill up the details of the “Check In Registration Form” and click “Submit Form” once complete.
- Click “Done” button on the lower left side of the page.


Preparing for Label Printing (optional)
The check-in kiosk will print labels based upon the configuration applied when it is initialized. Printing labels is not required.
Although printing using the app-based kiosk doesn’t require external setup, using the web-based kiosk does require a supplemental agent/utility application be run on a PC or Mac while check-in is taking place. This supplemental application will allow any kiosk running on your network to print to a wireless or wired printer that is attached to the computer where the “grplife print utility” (the agent) is running.
- Click on the “Calendar” icon from the left navigation menu.
- Select “Check In” and click “Configure Check-in”.
- Click “Print Utility” on the upper right side of the page.
- Once downloaded and installed, the application will display a list of all printers that have been configured on the machine.
- Before attempting to set any printer active, however, select “Options” to enter the license key displayed in the “Configure Check-In” page in grplife web application.
- With the license successfully applied and printer selected and, subsequently, registered with your grplife site, you’ll now be able to load the kiosk and choose this printer from the list of all available at the site.

Configure the Kiosk (web-based)
Having configured custom attributes, the appropriate groups and locations, the next step is to configure the kiosk. This instruction is particularly for the web-based version of the application.

- Click on the “Calendar” icon from the left navigation menu.
- Select “Check In” and click “Configure Check-in”.
- Click “Kiosk” or “Kiosk New Window” and it will launch the configuration screen.
- In the configuration page, select the types of check-ins which will be allowed in the session.
- Choose the location or event for which check-in is occurring.
(Optional) Select the printer from the list of available devices configured on the network (the one currently active when using the print utility) running on the Mac or PC referenced in the printing section- On the next lines, choose the number of child and guardian labels to print by default.
6. Select how names/results should be displayed when searching by name. Then select how names/results of the family should appear when the family is selected. In other words, when entering a family name to search, should children in the family appear as well? When selecting a family to display the list of members for check-in, should that list include parents and guardians or only display the children in the family.
7. Indicate the group assignment for new registrants. This is to say, for every new person registering to check-in to a particular location, which group should they be assigned to for attendance and general check-in.
8. Click to save these default settings (if desired). These settings can be saved for future use.


Managing Check-In Records
For those that have been checked-in to an event or location, reports may be generated, guardians can be notified by text message, attendance may be processed, and records may be checked out.
Those checked in may be checked out individually or en masse using the “Display Check-Ins” menu item.
- Click on the “Calendar” icon from the left navigation menu.
- Select “Check In” and click “Display Check -Ins”.
- Click “Check Out” next to the contact you want to check out.
- If multiple contacts should be checked out, tick each box on the right side of each name and once done, click “Checkout Selected” on the upper left side of the page.
For Individual Check Out

For Multiple Check Out

- With those that have been registered for a group during the check-in process, or by some other means, attendance may be taken by leaders of the group by using the “Attendance” menu entry of the “People Planning” section.
- Reports for current or past check-ins can be generated from within the “People Reports” under the "People Planning" section.
- For more detailed steps on how to generate these reports, check "Attendance Record" and "Generate People Reports" guide.
Sending Text Alerts and Manage Alerts

- "Select Check-in" allows you to choose specific attendees to send the sms alert to, while "Select Check-in Location" automatically sends the sms alert to all attendees (with a phone number on record) of the selected check-in location.
-
1Click on the “Calendar” icon from the left navigation menu.
-
2Select "Configure Check-In" tab.
-
3On the upper right side of the page click "Send Alert"
-
4Fill in the message box
-
5Click " Select Check-in" and choose the name of the attendee that you will send the message alert to.
-
6Click " Select Check-in Location" and choose the location and it will send the sms to all attendees of the group (as long as there's a phone number on record)
- Once done, click the "Send" button.

Click “Reset” button to start over, for selecting the Check In location or Check In.
- Click "Manage Alert" tab to resend a previous message alert.

