- Updated: December 21, 2022
SMS Messages
SMS messages can be sent to groups immediately or based on a pre-set schedule.

-
1Click the “Megaphone” icon (Outreach) from the left navigation menu.
-
2Click the "Create SMS" button at the right top of the page.
-
3In the new window, enter the title for the message (this will not be included in what is sent to the contacts)
-
4Enter the Message to be sent. (SMS limited to 160 characters)
-
5Select the groups to which the SMS should be sent.
-
6Check the text message for any revisions, once done click " Save". If the message is to be sent immediately click " Send".
-
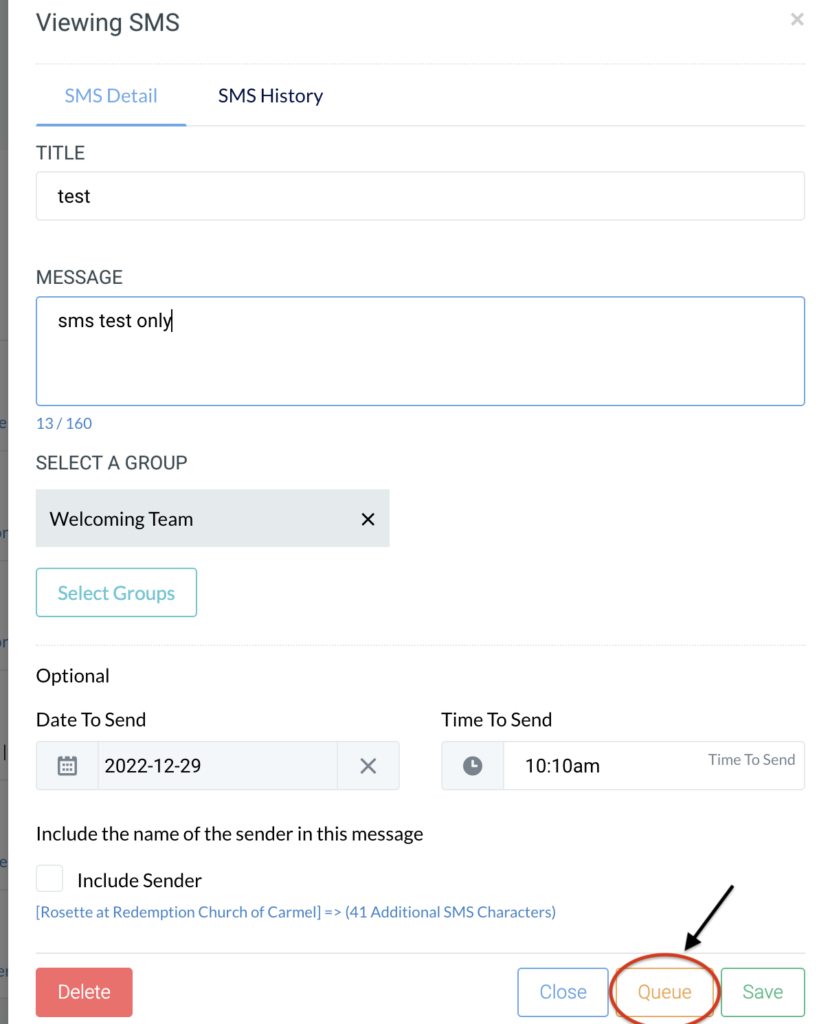
7If the message will be on scheduled. Provide a date and time when the message should go out. Click " Save".
-
8Once the message is saved, you'll be informed of the number of recipients to whom the message will be sent.
-
9If the message is to be sent immediately, click the "Send" button (it will only be visible if no date and time are selected) to process for delivery. If the message is scheduled for a later date, click the "Queue" button. (will be visible once a date and time are selected)
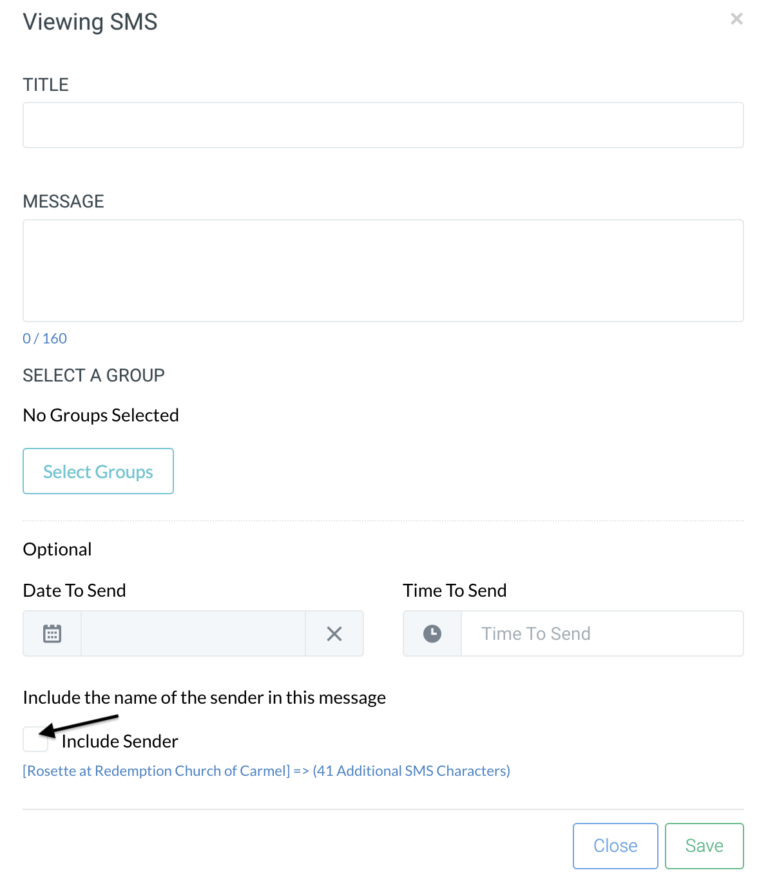
- Checking the box (on the lower part of the sms window) that includes the sender's name in this message will reduce the message length as the sender will be included). Leave this box unchecked if you do not require the sms to have the sender included.


Viewing SMS Logs and History

There are 3 tabs under messages: Messages, Consents, and Logs.
- Messages– you can view the message to be sent, the content, which group it will be sent to, and the date of delivery (if scheduled)
- Consents– allows you to view if the recipient has to allow or deny receiving text messages.
- Logs– allows you to view (SMS logs from previous months) and reply to SMS
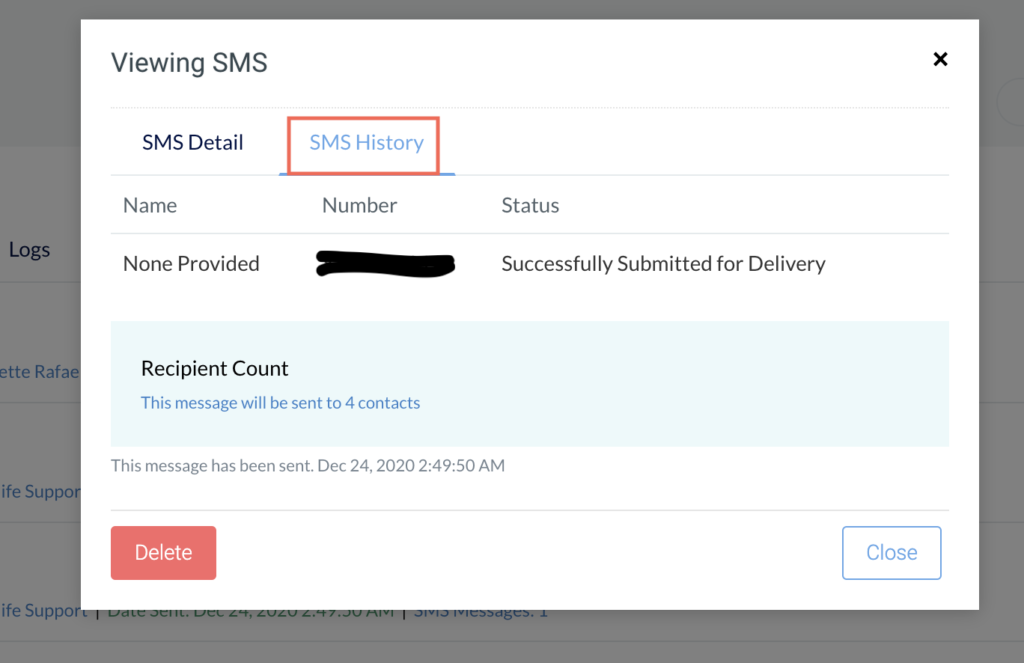
To view SMS history, simply click “View” on the SMS you would like to check the details and history. Click the “SMS History” tab and you will see the Name, number, and status of the SMS.

Voice - Pre-Recorded Outbound Messages
-
1Click the “Megaphone” icon Outreach in the left navigation menu.
-
2Click the “ Phone tree” tile.
-
3Click “ Create Call” at the top of the page.
-
4Enter the details for the call (Title, Description, when to send the call, and the group contacts to whom the call should be made). The description can be where you type the script used in the recording; we recommend taking this approach.
-
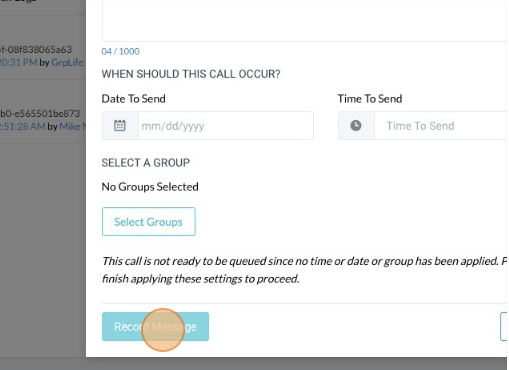
5Click the "Record Message".
-
6Enter the phone number that the system should call to record the outbound message, then click the "Dial" button (when the number is dialed, a recording will direct you through the steps for capturing your message. Follow the instructions as described by the auto-attendant)
-
7Once complete, the recorded message will be processed and loaded. If you're not seeing the message processing completed, or click the "Refresh" button doesn't present the update, try reloading the page. The system should take no longer than 1 minute to generate the outbound recording.
-
8With the recording complete, click the "Queue Call" button. The message will be set for delivery. The status of the outgoing call will display on the "Call Results" tab.
